Showing posts with label Food for Thought. Show all posts

Jan 21, 2012

Food for Thought: Beans 'n Gravy


My mom wasn't a world-famous chef.

I don't mean that disrespectfully, but when I was little, she didn't like to take any risks in the kitchen. She baked her own bread and she made amazing homemade pizza! Her sour cream cupcakes were the talk of the town and she made my favorite banana bread of all time. But most of her dishes were pretty ordinary. Dad was a "meat and potatoes" man, so we rarely ate anything new and different. I was OK with that (since I didn't know anything about the culinary world...that was way before the Food Network). I ate pretty much whatever I was served and I didn't complain. Except for one thing...I absolutely hated and would rather miss the entire meal than eat her green beans in tomato sauce!

So when my sweetie and I first started dating and he talked about his mom's beans 'n gravy, I refused to even taste them. He assured me that they were completely different from my mom's recipe. I think we may have even been married before I finally relented. And he was right, they were delicious. Give them a try and let me know what you think.

Beans 'n Gravy

green beans, warmed in microwave
white sauce
fresh ground pepper
unbuttered toast


I could bore you all with the details of how to make white sauce, but we all learned in Jr. High cooking class so you can just look at the pics and watch what a great job my sweetie does with it. Oh, hey, and notice my awesome new Tupperware pan he is using...


When your white sauce is thickened and ready to go, add the well-drained green beans.  Now generously sprinkle with pepper.
 

Break your toast into bite-sized pieces and then spoon the beans 'n gravy over the top. Serve immediately!
Mmmmmm...

The perfect comfort food!

Jan 6, 2012

Food for Thought - Belgian Waffles

When we got married in the early 80s, one of our favorite gifts was a waffle-maker. While we were in school we used it quite regularly since waffles were a pretty cheap meal for us. I’ve blogged before about the Grinch Waffles and the shaped waffles that Princess loves to make for the kids. But nothing excites them more than to open the fridge and find a ½ gallon of buttermilk. At my house that can only mean one thing…Belgian Waffles!

We got our first Belgian waffle-maker about five years ago after we used one in a hotel during free breakfast hour and the kids just loved it. My sweetie bought a couple after that and we used them so much that we are now on our third and fourth irons. My sweetie said that if you are looking for an iron, don’t go for the cheap ones, they just don’t last, especially if you are making them by the dozens like we are at our house.

For most of us, our favorite way to eat them is smothered with fresh whipped cream and strawberries. But the Prima Donna doesn’t like strawberries, even if they are drenched in a sweet glaze, so she puts syrup on hers…and fresh whipped cream. I know, eeewww! We borrowed our favorite recipe from the Food Network, but my sweetie couldn't resist making changes of his own. He puts in a little extra sugar and instead of half wheat and half white flour he uses one part wheat and three parts white. You really could go all wheat or all white if you wanted to. Oh, and he said to tell you to be careful with the cooking spray. Too much and they aren’t crispy…too little and they stick.  Hope you love them! They are one of our favorite treats.

Belgian Waffles

2 cups whole-wheat flour
6 cups white flour
1 cup sugar
2 tsp baking soda
4 tsp baking powder
4 tsp salt
12 whole beaten eggs
8 ounces unsalted butter, melted
1/2 gallon buttermilk
vegetable spray

Preheat your waffle iron.  Beat eggs and butter until combined. Then add buttermilk.


Add dry ingredients (my sweetie cheats because we have two mixer bowls).


Allow to rest for five minutes.


I'm not sure why we don't have any pics of the irons themselves, but they are the kind that you flip half way through. Just follow the cooking instructions on your own waffle irons.

Clean a couple of boxes of strawberries. Add a package of strawberry glaze if desired. (They are good without it too.)


You can use Cool Whip, but beating your own cream just takes a minute and it is better and cheaper. Beat a half pint of cream with a couple of tablespoons of powdered (or regular) sugar and then add a tsp of vanilla at the last minute. (Tupperware makes an amazing tool called a Whip n Prep. I had never actually whipped cream until I got one of those and it takes about one minute to come up with this!)


Then all you have to do is eat it! So much for New Year's Resolutions...

Dec 30, 2011

Food for Thought - Eggnog Shakes

The first Christmas my sweetie and I spent with his family, I learned of a fun new tradition called the Nut Prize. My MIL would make a yummy treat, usually chocolate pudding, then hide a nut down in one of the bowls. As the kids were eating, one of them would discover the nut and then they would receive a gift.

So I participated that first year, but when I discovered the nut in my treat, I was surprised that all of my sweetie's siblings were rather upset that I won. The gift happened to be a large bag of M&Ms that I promptly shared, but I still felt like an outsider that was not really welcome. Thank goodness that only happened the first year!

Despite my discomfort, my sweetie loved this tradition and it is one we have adopted into our own celebrations although he likes to make it a bit different from what his mom did. First of all, our treat of choice is generally eggnog shakes. Secondly, he likes to put in more than one nut so we have several winners each time. And he also prefers to award the Nut Prize away from the main holiday so the gifts are appreciated more.

Last night was the chosen night this year. After my sweetie made these delicious shakes, I stowed almonds in four of the twelve cups. (Bossy's family didn't join us this year.) Baby Doll, Sweetie, Drama Queen, and Princess were the lucky ones. Four inexpensive board games were revealed and enjoyed by everyone. By the way, I never liked eggnog until I had it mixed with ice cream. Now it is the required dessert at our family Christmas party every year although I usually make my baby sister get down on her knees and beg before I pull the ingredients from the freezer. Give it a try!

Eggnog Shakes

1 gallon vanilla ice cream
1 quart eggnog
freshly grated nutmeg


Scoop slightly softened vanilla ice cream into the bowl of your mixer. Add the eggnog slowly. Beat until smooth, but as little as possible. When we have beaten it too long, it adds air to the mixture and that's no good. Add freshly grated nutmeg if possible, if not, the ground stuff works well too. Add nuts and gifts as desired. Mix with plenty of laughter and love...serve immediately.

Dec 16, 2011

Food for Thought - Gingerbread Cookies

Sport loves hanging out with the cute girls!
You all know I love scouts and I have a little Girl Scout troop that meets at my house every other Friday. Today we had our Christmas party and finished our Cooking badge we were working on.

I have never made gingerbread before and I guess I’ve actually not made it now either. But the Drama Queen is a pro and she offered to be in charge. Because we only have an hour and a half with the girls, she mixed up dough beforehand so that it could be chilled. Then after they had rolled and cut and decorated, they actually mixed up the dough. It was kind of backwards, but it worked.

We also made some cute Christmas ornaments, had a visit from Santa, and ate eggnog shakes. I’m always a bit exhausted when I’m finished with a scout meeting, but it’s a good kind of tired. Now we are going to use the newly mixed dough to make cookies for the family party. Hope you love it!

Gingerbread Cookies

½ cup shortening
2 ½ cups flour
½ cup sugar
½ cup molasses
1 egg
1tablespoon vinegar
1 teaspoon baking powder
1 teaspoon ground ginger
½ teaspoon baking soda
½ teaspoon ground cinnamon
½ teaspoon ground cloves

In a bowl, beat all the ingredients but only add half the flour at this time.  Beat until dough is thoroughly combined, then slowly add the remaining flour.  Chill for 3 hours or until easy to handle. 

Divide the chilled dough in half and roll out each half on a lightly-floured surface.  For simple circles, flatten to 1/8 of an inch, cut with a glass, and then bake at 375 for 4-6 minutes on a greased cookie sheet or parchment paper.  For gingerbread men, flatten dough to 1/4 of an inch and bake for 6-8 minutes instead.  The girl scouts made theirs extra thick so we ended up cooking them for ten minutes and that crisped up the little ones.  Great recipe and easy to do!   


Dec 2, 2011

Food For Thought - Amazing Dinner Rolls

As promised, I’m going to give you my sweetie’s recipe for his mom’s amazing rolls. When I told the kids I was planning to post this on the blog I had several nay-sayers! They all thought we should keep this one secret although I have no idea why. I’m all for encouraging people to cook more and if you try this one, I promise you won’t be disappointed. In fact, the kids gobbled them up so quickly we didn't even remember to take any pictures of the finished item!

So on Thanksgiving morning, my sweetie asked us all to write something we were thankful for on small strips of paper. We weren’t sure what he was up to, but pretty much everyone took a minute to honor his wishes (nobody wanted him to be grumpy on a holiday!) and then we folded them all up and put them in a bowl. They sat on the table for most of the day while the meal was prepared. Then when it was finally time to cut the roll dough, my sweetie made one special tray and inside of each of these rolls, he tucked a tiny paper of gratitude. I thought he was crazy! But he promised me he had seen the suggestion somewhere on the internet and he knew it would work.

Hours later as we all gathered around the table, each plate had one special roll placed carefully in the middle. All the rest of the food was on a side table awaiting orders from my sweetie. After a significantly long prayer, we started with one person breaking open their roll and reading the paper inside. Miraculously, most of them were still readable! Then we all guessed who we thought had written that paper. When nearly everyone’s paper had been shared, I looked around expectantly. Mine had not been opened. That’s when my sweetie confessed that there were two extra rolls still in the bowl. He had worried that not everyone had written one, so he had made a couple of extra ones. I asked him to pull them out and read them. I smiled to myself as I watched him crack open the first one. This couldn’t have worked out better if I had planned it!

He unrolled the scrap of paper and began to read, “I’m thankful for the…” Then he actually BLUSHED! It’s been a while since I’ve seen him do that. He started again and then he tossed the paper on the table. “I can’t read this!” he stated and my daughter picked it up. “Awww!” she said and then read, “I’m thankful for the amazing guy I’ve been able to share the last 28 years with.” Then he blushed AGAIN! Yeah, I have that affect on people…anyway, here’s the roll recipe. Hope you love it as much as I do. (You probably already guessed that we have to make four or five batches of this dough to satisfy everyone.)

Mom’s Rolls

1 pkg yeast + 1 tbsp sugar
¼ cup lukewarm water
1/3 cup sugar
¼ cup butter
1 ½ tsp salt
1 cup milk warmed in the microwave for 1 minute
1 egg slightly beaten
3 ½ cups flour

First add the yeast and the tbsp of sugar to the warm water. Set aside. This needs to bubble up for several minutes before it will be ready to add to the rest of the ingredients.

In your mixing bowl, throw in the egg, butter, and warm milk. Beat well. Add the salt, sugar, and yeast mixture. Beat again.

Gradually add flour. Dough will be a bit sticky. Beat with a dough hook or knead by hand for several minutes.

Let rise until doubled in bulk or about an hour. Punch down. Let rest for 10 minutes.

Roll to about ½” thickness on a floured surface. My sweetie likes to cut them with a Tupperware cup, but you can use a round cookie cutter if you prefer.


Dip the circle of dough in melted butter and then fold it in half.

Place on a baking sheet. Let rise for at least another 30 minutes.

Bake at 350 for 20 minutes. My sweetie rubs the tops with butter again when they come out of the oven. Not the most healthy roll on the planet, but arguably the most tasty! What do you think?


Nov 25, 2011

Food for Thought Guest Blogger: Bossy's 14-Layer Jello

Much like she hinted last Friday about me doing a guest blog about Taco, Mom has been telling me since mid-March she wanted to do a food for thought with 14-Layer Jell-o.  I had intentions of doing it for St. Patrick’s Day, I even bought the yogurt, but I just couldn’t find the time to do it. 

Jell-o and toast are two things I just can’t cook well.  I can cook a mean stir fry and Gamer loves my Cajun Chicken.  But I have never been able to fully "set" a Jell-o, so five years or so ago Mom asked me to make the 14-Layer Jell-o for Thanksgiving.  We all thought it would be a disaster!  I am pretty sure my Dad was laughing and Mom thought it was a great way to kill a very time and fridge space consuming Thanksgiving tradition. (The tradition came from Mom’s big sister.)

As it turns out, with this Jell-o the individual layers only have to set 1/8 inch at a time: perfect for those of us who always make Jell-o Soup.  It takes an entire shelf to make the 2 9x13 pans we need to feed our crew, so my fridge is relegated for Jell-o.

*Disclaimer* I only make this once a year, so the first couple of layers are usually rocky.  This time I tried to discover what caused the mistakes and I think I have it perfected.  That being said there was no way I was going to make a third pan just for perfect pictures.  I discovered the side of my fridge the clear pan was on wasn’t getting cold in the middle of the shelf so I had to balance it on the blue pan and in the groove of the shelf to the back wall.  Be prepared for the unexpected. And try to ignore the ugliness in the clear pan.

14-Layer Jell-o 

Seven to Eight flavors of Jell-o in different colors 2 boxes each.
(For 2 9x13 pans use large boxes of Jell-o or 1 9x13 use small boxes.  If you choose to use large boxes for one pan be prepared to split each box in half as you mix. )

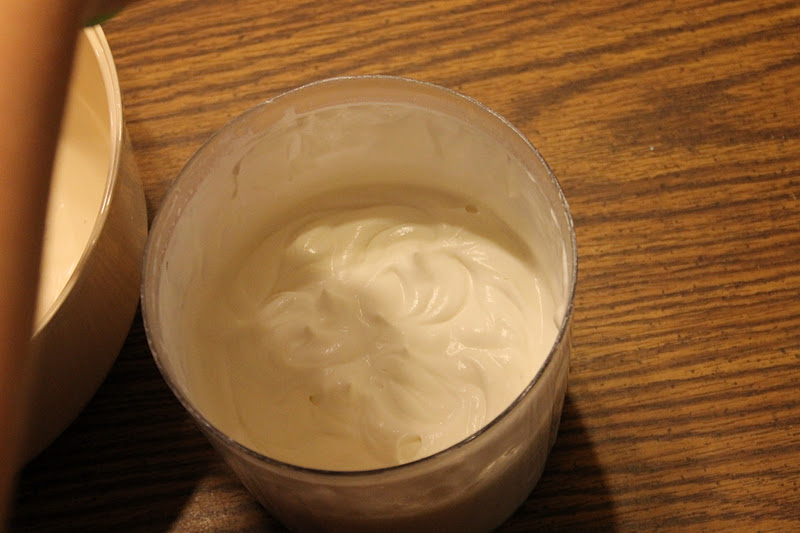
2 quarts of vanilla yogurt.

First line up your Jell-o in the order you wish to prepare it.  Layers look better if they are ordered dark to light.  When I make it, it usually goes like this:
All the Jello I used

1-     Black cherry or Grape
2-     Raspberry or Cherry
3-     Strawberry Banana (my favorite smelling Jell-o)
4-     Orange
5-     Peach or Orange-Pineapple (If I can’t find these I skip this and add Strawberry Kiwi as the final layer.)
6-     Lemon
7-     Lime

Have a spare flavor just in case.  I always have a box of blue just in case. (We use sugar free Jell-o because I am diabetic.  Berry Blue does not come in sugar-free so I save this as an emergency flavor and for the top so it can be easily removed.)

*If you chose to use full sugared Jell-o you need a measuring cup that is at least 3 cups.*

Each flavor has two parts, a “normal” layer and a yogurt layer.  Always start with the “normal” layer.

For one 9x13 (with small boxes) use 1 cup boiling ¼ cup cold and ¼ c yogurt.
For two 9x13 (with large boxes) use 2 cup boiling ½ c cold and ½ c yogurt.
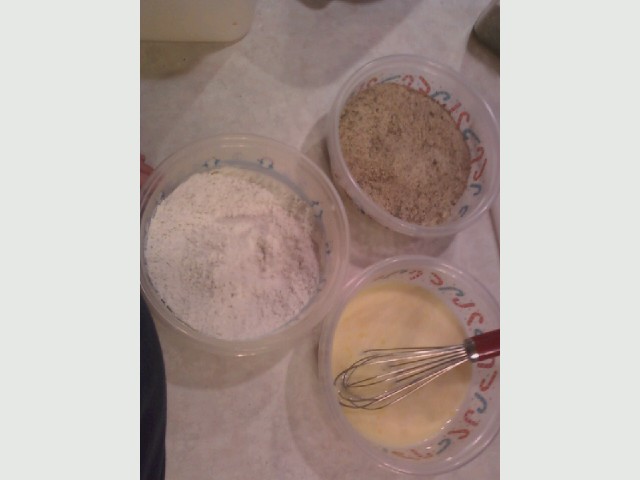
All whisked up!
Heat 2 cups of water to boiling.  We use a tea kettle and a Pyrex measuring cup.  In fact, this jello is the only reason I own my tea kettle.  This way I can keep heating the water without measuring first.

Whisk one large box of Jell-o into the 2 cups boiling water. (If you are making one pan with a large box, at this point you want to split your Jell-o into 2 parts.  Then add the cold water to one and add the yogurt to the other.)

Adding Yogurt
Add ½ c cold water and whisk well.  Allow to sit on the counter for 5 minutes.  (This is very important, and I discovered it to be my biggest problem in wrecking layers.  If you pour the boiling Jell-o onto the softest layer below it will break through and mix the layers.  Allowing the layer to cool on the counter also helps reduce the time it takes layers to set.  Because of this I usually start my next layer about halfway into the set time.)

This should make roughly 2 ½ cups of Jell-o.  Pour ½ of the Jell-o into your first pan.  Pour directly into the fridge pouring carefully and slowly.  This will become important on other layers.  Try to pour it only on the sloped side of the pan and not directly onto the layer below as that creates holes in the Jell-o. (My aunt likes to pour it onto a spoon. That works too.) Pour the remaining Jell-o into the second pan.

Allow layer to set.  The first layer will be the longest.  The pans are probably not chilled to the fridge yet and you can pour this layer boiling.  Plan on 30 minutes for this layer and 20 minutes for each subsequent layer.  (20 x 13 + 30 = 290 or nearly 5 hours so plan accordingly.  My husband and I stay up late and play a game together.)

Up to Layer 8!


Repeat until your pan it full.  Set to firm.  Since Thanksgiving always means a full fridge at my mother's house, we turn the fridge on full blast and try to get the jello mostly frozen.  Then it can sit in the car until we are ready to serve.  Cut into squares and serve on plates.  Some of us peel off individual layers to eat and some of us eat it by the spoonful.  Enjoy!

Drama Queen says : Mom left me in charge of getting this up while she and Dad went shopping, so I apologize in advance if the formatting is off.  I'll see if I can convince Teach to adding some pictures of the finished jello and us all eating it up!  Hope you had a wonderful Thanksgiving!

Nov 18, 2011

Guest Blogger - Food for Thought: Drama Queen’s Parmesan Chicken Nuggets

While off at college, I spent lots of fun times cooking but also lots and lots of times dreading cooking.   I spent my first year in a sleep-study dorm, and then moved into a duplex with three other girls. The next year it was down to two other girls, and then my final year it was just me and one roommate.  Needless to say, some of the glamor of getting to choose my own menu each day lost its sparkle.

However!  During those years of running my own kitchen (and with the assistance of fabulous roommates who helped me figure out that whole salt and pepper thing – aside from scrambled eggs and mashed potatoes cuz Daddy learned me good on those), I got lots of opportunities to experiment with food.  Some of these were the most miiiiiserable failures (aka fried gnocci) and some were mind-blowingly delicious (leftover crepe filling and berries on warm chocolate cake or Jes’ brilliant chicken and dumplings that once perished quite tragically thanks to silly boys who don’t clean their stove).  It was pretty easy to judge the success of a recipe in my life:  it got made once, or once-a-month.

This was a once-a-month-or-more recipe.  It actually originated from a delicious restaurant-style chicken Parmesan that also works with pork.

Anyways…here’s how it goes:


Take thawed chicken, as much as you think you’ll need.  For my roommate and I we usually cut up one large breast or two small ones.  As you can see from the pics, feeding the whole dozen takes much more!  Chop these into the size pieces you want.  Some people like strips, some medallions or chunks.  I find strips fry up the fastest.  [Note: if you want to make this over into Parmesan chicken, you should flatten the breast to about ½ - ¾  inch rather than cutting into pieces.]

Then, you will need to have three dredging bowls set up.  In the first you put flour mixed with salt and pepper.  In the second you place egg and a small amount of water.  For the one breast recipe, one medium egg and a dash of water whisked together was enough.  For larger batches, guess large cuz you’ll probably have to mix up more anyways.  The third bowl is filled with basic bread-crumbs and LOTS of Italian seasoning.  You can also add the dried Parmesan cheese. [Note: If doing Parmesan chicken, it's better to place bread crumbs on a deep-edged plate so you’re not trying to shove a goopy, drippy piece of meat into breadcrumbs that won’t stick so well under that much pressure.  Use a plate.  It works.]


Chicken gets dipped in the bowls in order: 1, 2, 3.  Then, place it somewhere out of the way as you wait for your oil to heat.

There are two ways to go about frying.  To get the best flavor, heat a small amount of evoo (extra virgin olive oil) in a pan and fry about six minutes for each side when doing a full breast.  Adjust to your pan size and stove temperature.  The other option is simply to toss it in the deep-fryer full of good, old, veggie oil.  Either way works, really.  The deep-fryer cuts out the need to turn the chicken over halfway through, but you get a better crisp with the evoo.  It’s up to you and your patience level.

Remove the chicken from the oil and let it drain for a minute.  Serve it up with French fries or some of that super delicious herb-and-butter Rice-a-Roni.

[For those of you wanting to sauce it up, layer your crispy, thin breasts in a 9" by 13" and then smother with mozzarella cheese or fresh Parmesan.  Carefully add your favorite spaghetti sauce and douse with more cheese.  Slip it in the oven (350* for 15-20 minutes) to let it get all warm and bubbly.  Then serve on a fresh bed of pasta.  Mmmmmmm…]

That, dear blog world, is how we feed a happy Drama Queen.


Nov 11, 2011

Food for Thought - Applesauce

The Dog Walker asked me if I was ever going to do a Food for Thought again since I hadn’t done one for two weeks. And I quote… “It’s my blog and I can do whatever I want!” Then he proceeded to irritate me for at least another hour texting me suggestions of what I needed to post about. So here I am, succumbing to kid pressure once again.

I am not an apple fan. I don’t drink apple juice because it has way too many calories. I know it’s un-American, but I don’t really even like apple pie unless it has a large scoop of vanilla ice cream on top. I will occasionally eat an apple if it’s not tart, and I always pass on store-bought applesauce. But I LOVE a dish of freshly-made warm applesauce!

My mom always made applesauce when we were kids. She had an old crank strainer that you tucked into your arm like it was a mixing bowl and she had to crank that thing for hours to get much out of it. We have an updated version that my sweetie believed was still too slow, so he rigged up a drill and now he can strain a dozen quarts of applesauce in about 10 minutes. Of course you have to have a helper who isn’t afraid of being sprayed with the hot pulp when the drill goes a little too fast. We used to have a half dozen apple trees but now we only have two, one red delicious and one that was supposed to be a Green Spire Linden. For a Linden, it sure makes good applesauce!

We have two large stockpots that my sweetie found for $20/each at the old Weinstock's about 20 years ago. (They really are one of the best purchases he ever made even though I gave him crap about it at the time.) Each one will hold a five-gallon bucket full of chopped apples. We like using several varieties just to give us a more flavorful sauce. My favorite kind to add is the Golden Delicious and we generally buy a couple of boxes and mix them in.

I bought my strainer at the local Macey's grocery store for about forty bucks. It can handle all the apple cores and seeds, but not the stems, so I pull out the stems and cut the apples in quarters. Then I toss them in the pot. When the pot is nearly full (leave a little stirring room), I add about 2 cups of water and turn in on medium high. Make sure to stir it often so it doesn’t burn and cook it for about 30 – 40 minutes until the apples are soft.

Let it cool for about another 30 minutes or so before grinding. You want the applesauce to still be hot, especially if you are planning to put it into jars. Otherwise, you have to process it much longer.

My mom always added sugar to her applesauce, but we never do. Since all apples are different, some need sugar and some don’t. It’s just as easy to add it when you are eating it. I like to add a bit of cinnamon and I think I’ve mentioned before that my kids love this warm applesauce served over French Toast. And you don't even need to add ice cream!

Oct 21, 2011

Food for Thought - Chicken Cordon Bleu

I think we have probably established that I am not the world’s best gourmet cook. I like to make things that are economical, quick and easy but still tasty. Now you all know that I grew up in small-town Utah. Like almost all kids of the 70s, I loved watching TV, especially the commercials. That’s how we learned about the world outside of our little bubble. 
 
We didn’t have much money growing up, and certainly not any to spare for eating out, so my favorite commercials were usually the ones for fast food and restaurants. I loved the commercials for Wendy’s and MacDonalds, (although the first time I tasted a Big Mac I was disappointed). But the one thing that looked absolutely amazing to me was the Sizzler ones with the “Steak and Malibu Chicken.” I’d never had Malibu Chicken before and it looked exotic and oh so tasty! 
 
I was an adult before I ever got to try it for real and it was something I enjoyed and wanted to learn to make. I’m not sure how it differs from Chicken Cordon Bleu, except that people often pound out the chicken for Cordon Bleu and I’m much too lazy to do that. So take a few minutes and try this yummy entrée and don’t forget the mustard sauce (Miracle Whip or Mayo mixed with mustard). It’s perfect for dipping!

Chicken Cordon Bleu

2 lbs chicken breasts
canned, seasoned bread crumbs
sliced ham
sliced Swiss cheese (you can use mozzarella or Monterey jack in a pinch)

Cover a cookie sheet with foil (makes cleanup easier, but is not necessary).  Place breasts (not touching) on the cookie sheet.  
 
 
Sprinkle generously with breadcrumbs.   Bake at 375 degrees for about 20 minutes.  Cut open to make sure they are completely cooked.  
 
 
Cover each breast with a slice of ham and then a slice of cheese.  Return to the oven for about 3 minutes to warm the ham and melt the cheese.  Serve with pasta or rice.


For the dipping sauce, add a couple of teaspoons of mustard to a quarter of a cup of Miracle Whip or mayo.