
 I’ve told you before about Grandpa’s pear tree. We always had tons of pears. But we put up other fruit and veggies too. Often a neighbor would call and offer our family a chance to pick beans or tomatoes in their gardens and Mom would haul us all over and send us through the patch. Mom also ordered fruit from the travelling salesman that came through our small town several times each year. His name was Max Pine (isn’t it funny I remember his name?) and we usually bought a half dozen boxes of apples or peaches from him every season.
Sometimes he even had tomatoes and then Mom made stewed tomatoes. I’m sure she put them in spaghetti sauce and stuff like that, but I remember just eating them hot from the jar. I love stewed tomatoes (any tomatoes, really), but most of my kids refuse to eat them. Now that we have nice red ones from the garden, I’ve been feeding them to Baby Doll. I don’t want to raise another child who can’t appreciate the beauty of a fresh-picked tomato when the skin is still warm from the sun and it burst in your mouth…too bad it’s too dark to go outside, I could use one of those about now…ummm.
 But today I want to tell you how to can pears. My mom did it the long, hard way, hand-peeling every pear. When I met my sweetie, his family had the process stream-lined into something much more manageable. This is his family method and it’s really not that hard. The pears taste so much better than those you can buy at the store. Do you do any canning? Please tell me I’m not the only one.
Canning Pears
Once the pears turn yellow, they are ready. You don’t want them to be mushy, but green is no good either. Wash the pears thoroughly in cool water. Bring a pan of water to a full rolling boil. I use the kind of pan designed for cooking spaghetti because it already has a built in strainer, but if you don’t have one, you can just boil about six inches of water in a large pan and use a ladle to catch the pears when they are done.


Fill two large bowls half-way up with cold water. (My sweetie’s family even insisted on putting in ice cubes, but we have gotten away from that practice in recent years.)
Drop between four and six pears into the boiling water. Count 15 seconds. Pull them up and dump them in the first bowl of cool water. If they are ripe, you should be able to gently pull the skins off into the water. If not, toss them back in the boiling water for a few more seconds.
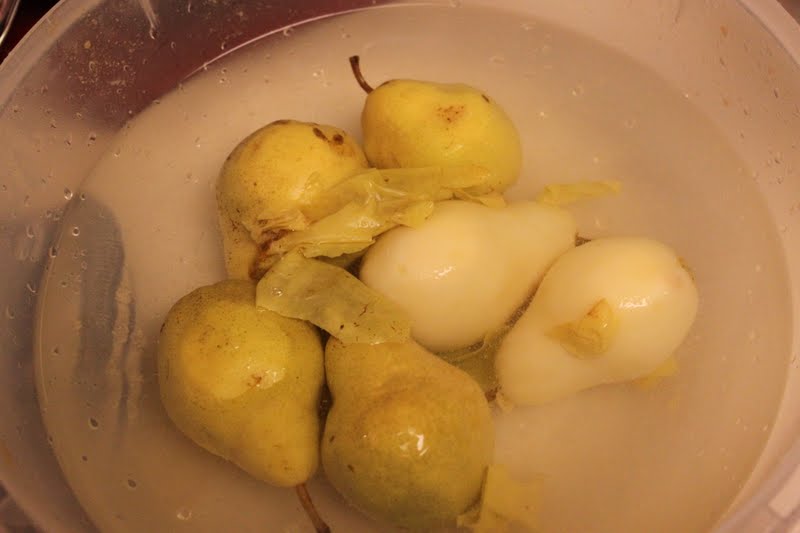
When the skins are gone, put the pears in the second bowl of water. Because there are so many of us, we have people doing all of these jobs all the time, but you can do it all by yourself. From the second bowl, slice each pear in half from the stem down through the core.


 Now this little tool is an essential part of pear canning, but you have to get it at your local craft store. It is actually a sculpting tool, but it works perfectly to slice the core from your pear. Use the rounded end to get the seed ball out and then use the narrow end to slice the line up to and including the stem. If you leave these in, your finished pears will be stringy and tough.
Now place the pear in a wide-mouthed quart-sized Mason jar that you have washed in hot water. I always put mine in with the cut side down, but I hear that it doesn’t matter how they go into the bottle. Fill the jar to the neck of the jar with cut pears.
You need to cover your pears with simple syrup made from sugar and water. We use a lighter syrup that is two parts water to one part sugar. So four cups of water mixed with two cups of sugar. Heat it up on the stove on medium heat, stirring frequently until it becomes glossy and the sugar is entirely dissolved. I usually mix up a couple of gallons of water to a gallon of sugar. Then add a couple of tablespoons of Fruit Fresh.
(My mom never added this and her pears were more brown. They were still tasty, but they didn’t look very good. The Fruit Fresh will turn them into a beautiful white color shortly after it is added, even if they have turned brown while you are working on them. )


Pour your syrup over the pears and fill the jars to within about ½ an inch from the top. Now fill a quart-sized microwave-safe bowl half full of water and heat it up for a couple of minutes on HIGH. After it is hot, place your canning lids in the water. Be sure to throw them in one at a time so the hot water can soften the rubber on each lid. Never reuse lids. Before you put the lids on the jars, take a clean wet cloth and wipe the rims of each jar. A few drops of syrup or a tiny piece of fruit will keep the jar from sealing properly. Then place your lids and tighten them with the rings.

Now they are ready to go into a canner. If you don’t have a canner, you can use a large stockpot with a cookie rack in the bottom. Fill the canner with water and add the jars. The water should cover the jars completely. Bring the water to a boil. Boil for 20 minutes. When the timer rings, remove the jars. When the jars are completely cool, I take off the rings and gently wash the jars in soapy water. It is not necessary to store the jars with the rings on. Make sure you test each lid. If the top pops up and down, the jar is not sealed properly and you need to refrigerate it and eat it within a couple of days.

So there you have it! Canned pears. You can do peaches the same way except that you don’t need the sculpting tool to remove the pit. They also need to be scalded for about 30 seconds rather than 15. Enjoy!
7 comments:
That looks delicious and reasonably easy to make, though I think all the extra hands probably makes it that much easier. Perhaps, in a year or two I might brave canning.
Wow! I wish you had done this post 2 weeks ago! I have never heard of scalding the pears. I did 40 lbs of pears by myself the long way. Yep, I peeled all those suckers! I will definitely use your method next year! Thanks for the info!
I didn't know you could scald pears either! I have avoided canning them for the last couple of years because the thought of peeling all those slimy things was so un-apealling. My family loves them and with this new knowledge, maybe a pear tree is in order!
That actually doesn't seem nearly as awful as I always imagined it would be. Still a bit time consuming for me though.
Pears are my favorite fruit. Now I desperately want one for breakfast!! =]
looks great.. i am not a fan of pears.. never have been for as long as i can remember. i haven't ever tried canning on my own. we did it as kids with my mom though.. we canned everything!
I have always wanted to know how to can... Now I just have to get all the supplies including the fruit trees :)
I've never done any canning.
Post a Comment